It is important to have a good understanding of these basic tools for woodworking before starting any project, as it can help avoid costly mistakes in the future. This list includes some of the more common tool options, but there are many other types available based on individual needs or specific projects.
The most important thing to remember when choosing from this list is that quality should always be considered over price. Tools can be expensive upfront, but poor quality equipment will end up costing more in repairs down the line than an initial investment would cost!
Many people find that they enjoy using hand tools such as hammers and screwdrivers so much that they decide to add them to their woodworking tools collection. The following are some of the more common basic tools needed for woodworking for beginners, many of which you may already have in your garage or toolbox:
- Power saws & Hand saws
- Planes & Files
- Sanders
- Hammer & Mallet
- Drill & Screw Gun
- Tape Measure & Square
- Sawhorses & Workbench
Beginning woodworkers often feel overwhelmed by the large inventory of tools available on the market; it is easy to accumulate expensive, elaborate equipment in your shop. Fortunately, most beginner woodworking tools don’t have to be costly or complex; they should start with basic supplies so you can get an understanding of simplicity and do great work.
The basic woodworking tools are broken down into five categories: cutting, finishing, assembling, measuring, and holding. This beginner’s guide to must-have tools for woodworking breaks down the basic toolbox items so you know what your starting set should include and why.
If you would like to jump to a specific section of this ultimate guide, please use the following table of content.
- Cutting: Saws are No1 Basic Tools for Woodworking
- Supplies required for filing, planning, and sanding in woodworking
- Tools Needed For Assembling in Woodwork
- Tools For Measurement And Angles
- More Requirements For Successful Woodworking Projects
- Woodshop basic tools for beginners – Video
- Conclusion
- Frequently Asked Questions (FAQs)
Cutting: Saws are No1 Basic Tools for Woodworking
Rough wood pieces are the starting point of any type of project. Whether it is softwood or hardwood, most wood products start with cutting the stock to size. Saws come in different shapes and sizes for different tasks and here are some examples you might want to purchase at the beginning of your collection.
- Circular Saw
- Jigsaw ( Check best jigsaw for woodworkers )
- Compound Miter Saw ( Check best miter saw for homeowners )
- Table Saw
- Bandsaw
- Handsaws
Circular Saw
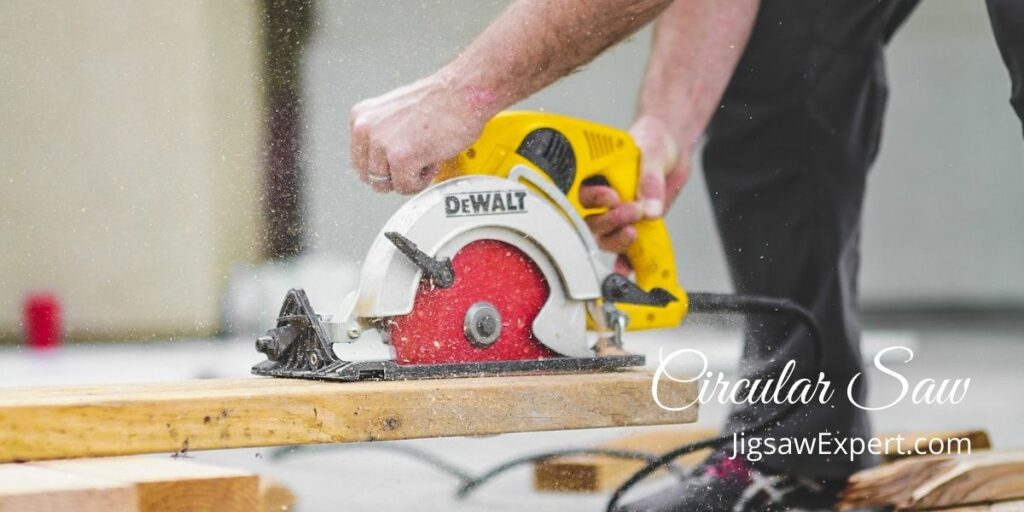
A circular saw is a must for any woodshop, yet it’s only the gateway to all things cutting. In terms of versatility and a sheer number of uses, you simply can’t beat the circular saw. I rarely go to my table saw after using a circular saw for a few minutes on most woodworking projects.
People love making taper cuts with circular saws, but I’ve never been too fond of them. Maybe it’s just a personal preference or maybe I haven’t enjoyed making taper cuts with them yet.
Circular saw blades are of 3 types
- Ripping Blades: Cut along the length of material, or cut straight lines
- Crosscut Blades: For making horizontal or vertical cuts, i.e. across the grain
- Combination Blades: Do do fine plunge cuts. OR Doing both types of cuts.
Ripping blades have evenly spaced teeth, while crosscut blades have staggered ones. Combination blades have both tooth patterns. If you are concerned about budget, go for a good combination blade fitted with carbide teeth; they offer the best all-around performance and will save you money in the long run because they last much longer than steel blades.
What are the types of Circular Saws?
All circular saws are electric. But they come in two flavors: corded and cordless. Corded saws are less expensive, but you’re at the mercy of an extension cord when working with them. They have more power than their cordless counterparts for big cuts, but they’re usually pretty heavy and awkward to use in tight spaces.
Corded circular saw
Corded circular saws have the cord built-in and can be very awkward to use on large projects like building decks or structural framing.
Cordless circular saw
Cordless circular saws are lighter, easier to handle in tight spots, and can be used off the charger for a lot of cutting operations. The batteries don’t last forever though, so you still need a corded circular saw to finish big projects.
I really like two features of my cordless circular saw: the battery life indicator and the variable speed trigger. These two features keep me from overdoing it when I’m making cuts, which helps to prolong my saw’s life.
A bump-start feature is nice too. I never use a circular saw without pushing on its back with my other hand while cutting.
What are the sizes of circular saws?
Circular saws come in all sizes, from the tiny 6-1/2″ models to 12-1/2″ saws. In my experience, they’re usually used for ripping larger stock like two by fours and maybe ripped down sheet goods like plywood or MDF at a 90-degree angle.
The most common sizes of circular saws are 190mm (7 1/4″) diameter and 165mm (6 1/2″) diameter. Circular saw sizes are determined by the diameter of the saw blade. The larger 7 1/4″ saws are great for ripping lumber and are preferable when cutting hardwood 2 x 4’s and sheet goods. Smaller 6 1/2″ circular saws are best used on trim work, smaller sheets of plywood, and wood projects with lots of small parts and joinery.
If you’re working with a lot of hardwood, go large. If your work mainly involves sheet goods, trim lumber, or plywoods up to 12″ wide, then smaller is best. I almost always use a 7 1/4″ circular saw on my projects that require ripping.
Jigsaw
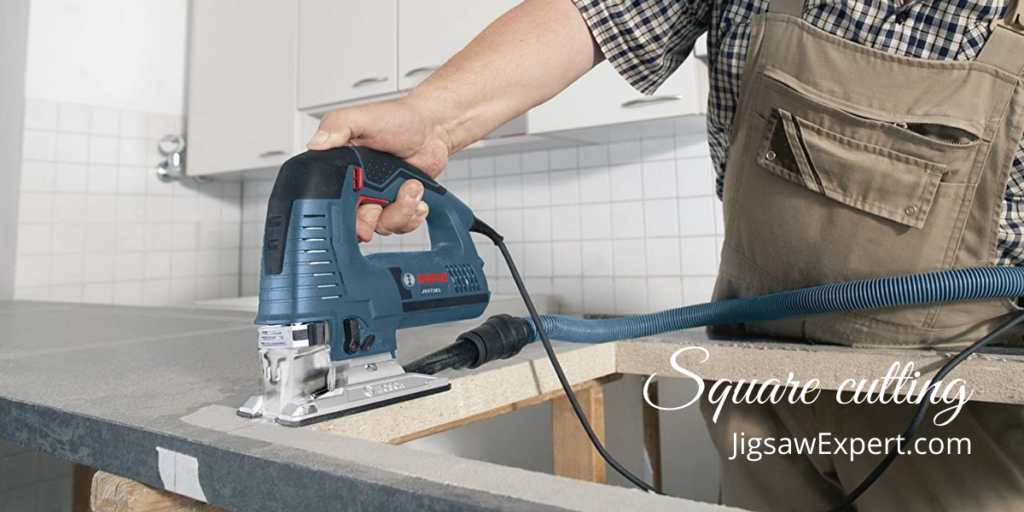
Every new woodworker should invest in a decent jigsaw. These electric power tools are best to used for straight, curved, or serpentine cuts like cuts found in a puzzle. Because of the reciprocating blades, Jigsaws are sometimes also called Saber-Saw.
Jigsaws differ significantly from circular saws. Unlike a circular saw, where the blade rotates to cut, jigsaws use back and forth motion like a handsaw to cut in straight lines.
Jigsaws have tons of uses for woodworkers. They can cut curves, rip boards to rough dimensions, and cut small pieces or thin strips quickly and easily. It’s basic shop equipment that every new woodworker should get used to using right away!
Check how to use a jigsaw, it’s easy and is one of the basic woodworking tools for beginners.
Jigsaw types
There are 2 types of jigsaws. One is corded and the second is cordless.
Corded Jigsaws
Corded jigsaws require you to plug them into an electrical outlet, and they are limited by how long the extension cord that comes with it runs. With a corded jigsaw, it’s best to use an extension cord that you know is long enough for the job and has a higher amp rating.
Cordless Jigsaws
Cordless jigsaws are completely portable and but they run out of power depending on the battery capacity. If you’re cutting wood more than a few inches thick, make sure to use a second battery.
Cordless jigsaws can be used for just about any job as long as the blades are appropriate for it. The main drawback with cordless jigsaws is that they are limited to a smaller cutting range because of their limited battery power. But due to recent technological development, this limit won’t be anymore.
Corded or Cordless? What type of jigsaw to choose?
To decide which jigsaw to buy, weigh the value of corded or cordless. If you’re going to use it only occasionally and if you’re cutting a small number of light plywood sheets then a cordless jigsaw is probably best. Otherwise, a corded jigsaw.
Jigsaw Blade Types
There are different types of blades, each made for a specific use. Fine-tooth blades are used to saw wood veneers, while coarse tooth-blades are used for fast and rough work. Also, their material can be Carbide tipped OR High-Speed Steel (HSS).
When buying jigsaw blades, consider this combination of three dimensions: diameter, thickness, and the number of teeth per inch.
Both blade types i.e. carbide tipped and high-speed steel (HSS), is good for a variety of uses—carbide is slightly more expensive but lasts longer. You’ll also want to consider blade thickness.
Thicker blades are stronger but more expensive and harder to handle.
Carbide tipped blades are the most commonly used jigsaw blade. They can be used for almost any woodworking task, but should not be used to cut non-ferrous metals or hard plastics.
Compound Miter Saw
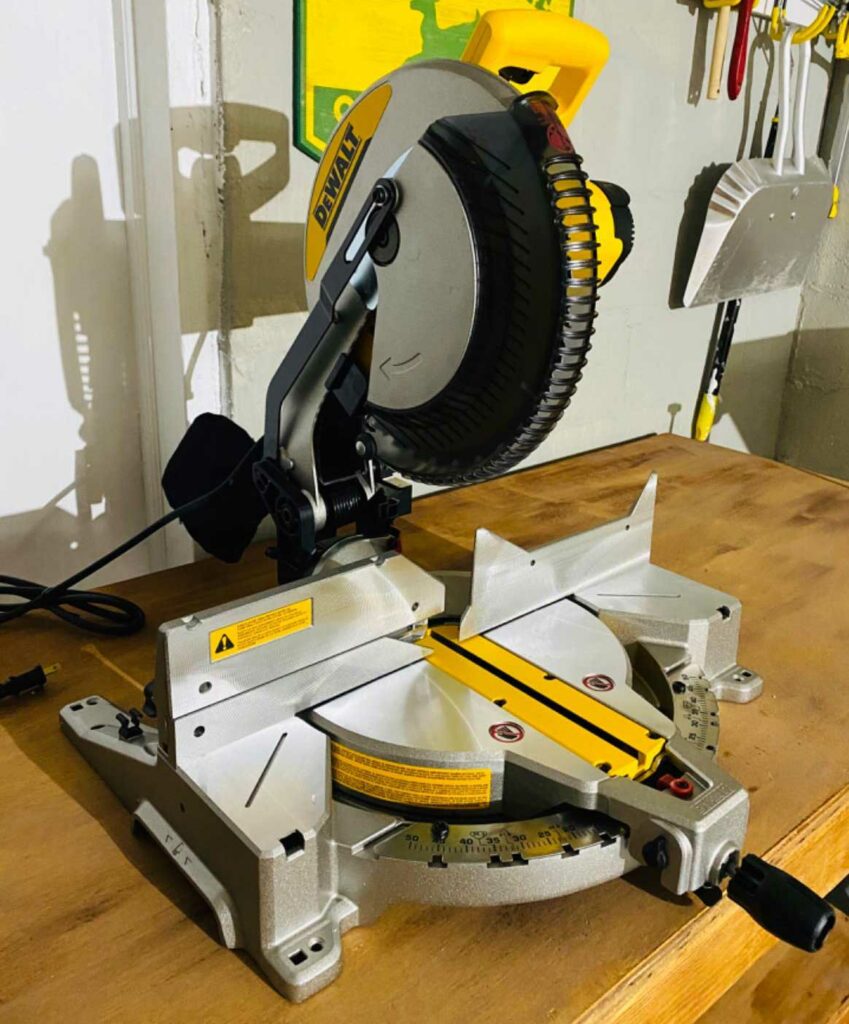
A compound miter saw is like a regular circular saw but is fixed in an arm and track like that of a radial arm saw. It still takes the same blades as a typical circular saw. Mostly, compound miter saws are manufactured for 10 and 12-inch blades, but smaller 7 ½” ones can also be installed if necessary. Users should always use quality crosscut blades for this type of equipment.
A compound miter saw has a pivoting arm with two degrees of freedom. One is the horizontal angle (90, 135, and 180) for crosscuts. The other is the vertical angle for bevel cuts (0-45).
A compound miter saw is useful for crosscutting longboards. The pivoting arm also makes it easier to make straight 90 and 45 degree cuts without additional setups, which helps reduce waste. However, it still lacks the precision of a table or radial saw. It still requires users to tilt the table, adjust the fence, and align screws to make a straight crosscut.
Check the best miter saw + best miter saw stands in the market. Miter saw is also one of the essential woodworking tools for beginners and pros.
Miter saws come in both corded and cordless designs.
These electric saws are exceptional options for all woodworking beginners. They provide the versatility and accuracy of a backsaw and standard miter box in one box. With a miter saw you can easily set up standard angles like 22 ½ to 90 degrees while also having the flexibility to cut angles in-between those extremes in both right and left sides.
For those looking for a variety of complex angles, compound miter saws are the perfect option. These work by tilting the blade head to any angle you need on either side and sliding it in length depending on your measurements.
Table Saw

Beginners should start with a table saw, if possible. They’re one of the most versatile cutting tools in the woodshop and can handle just about any woodworking task. Beginners may not need to purchase one right away since many area community colleges offer woodshop courses that include the use of a school-owned table saw.
For those who must buy their own table saw, the largest available should be considered as it’ll make future projects easier to complete. Beginners who use a 10-inch model will eventually want to upgrade to 14 or possibly even 16 inches. The most important thing is that the table saw has a good fence system with at least one micro-adjustment option.
Table saws are designed to resemble an upside-down circular saw. The table saw blade sticks up through a platform or surface on which you slide your object for cutting. Blade depth and angles can be easily adjusted with precision for accuracy.
Types of table saws
Table saws are of 3 types. All three versions are suitable for beginning woodworkers. But it is important to make a decision based on your size of work and the location. A fixed table saw that stays in one shop location or a portable saw that can be stored away. There are these two options:
- Cabinet table saws are heavy and often stay in the same place. The name comes from their motors being enclosed in a lower cabinet with a belt and pulley system that rotates the blade (thus, “cabinet” or enclosure-driven). They’re excellent for all-purpose work and for all beginners, from chopping lumber to cutting out simple joinery. They comes in 1-3 phase motors and are available in a variety of sizes.
- Benchtop table saws are lighter but portable. They’re perfect for making quick work of smaller projects as well as easily being moved between locations. Most benchtop table saws can be direct drive, but some others may be chain driven to reduce noise created by the motor.
- Contractor table saws are the tightest designs with quick and easy cutting that is best for jobsites. They’re also economical, making them a good choice for beginners learning their task. While building contractors are most happy to use contractor table saws, beginners can equally enjoy their usage for what they provide.
Contractor table saws have legs beneath them instead of the cabinet’s casters. Contractor saws are lighter but often have fewer features. The hybrid table saw is a cross between the contractor saw and the cabinet version, offering some features from both for a slightly higher price point. Beginners can get good results with either model.
Bandsaw
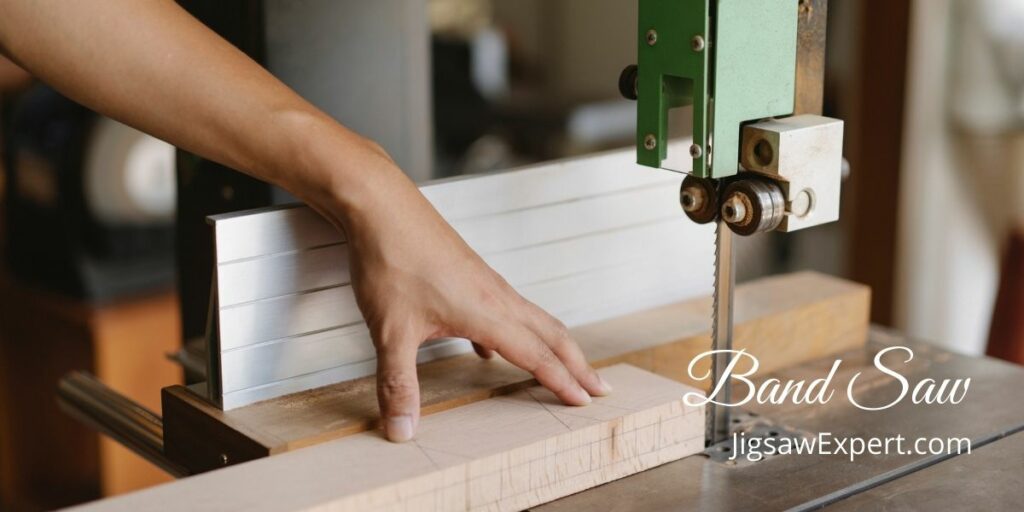
A bandsaw is a fairly large tool and it can cut through almost anything you need to make shorter lengths of wood stock. It’s like the circular and saber saws. In a bandsaw, the teeth are attached to an endlessly looping flat steel band that rotates around upper and lower pulleys. A fixed table sits between these two pulleys for angled cuts.
Beginner’s tip: It is important that you put some pressure on your material as it’s going through the bandsaw. This will help prevent kickback (when the material suddenly moves back towards you). Also, keep your hands clear of the blade.
Bandsaw sizes
Bandsaws come in many sizes. Choose your size based on the stock you are cutting and how intricate cuts you want to make. There are two main characteristics:
- Depth capacity refers to how far the blade is revealed between pulleys. This goes up from 4 inches for smaller machines, all the way to 12 inches or more for big ones. It determines what size of material you can cut through on that particular machine. You can say that the depth capacity is the maximum thickness of material that it can cut.
- The throat capacity is the measure of space between the blade and frame. With a deep throat, curving work can be turned easier on your bandsaw’s workbench.
Bandsaw blades come in different styles. Coarse tooth blades are for faster cuts and fine teeth are best suited for smoother cutting. Blade width matters depending on the job you’re trying to do. Wide blades are good for ripping and straight cuts while narrow blades make curved cuts easier.
Handsaw
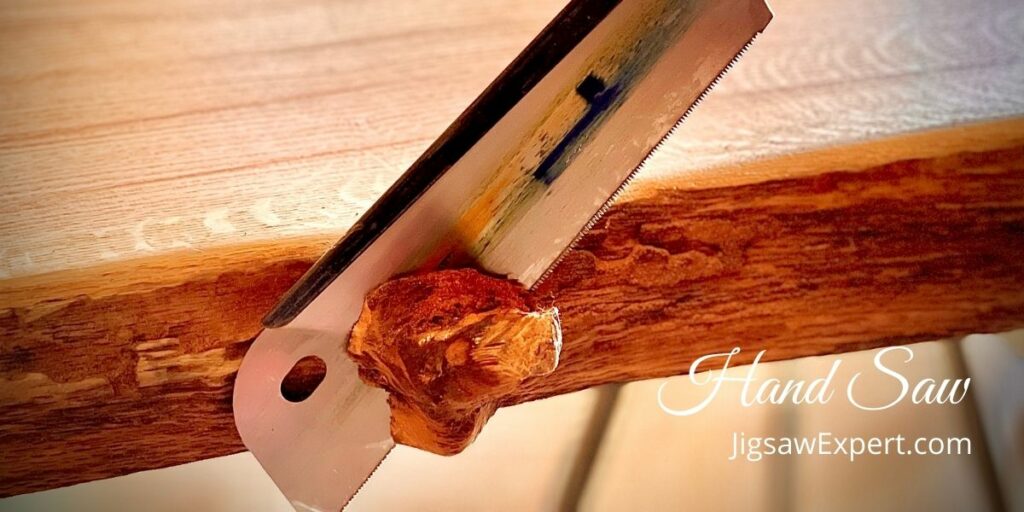
The oldest type of saw and have been used since ancient times. They have toothed steel blades with wooden handles, cutting by back and forth motion. They’re still a staple for woodworkers, especially for beginners who are just getting started making tables and chairs as well as simple pieces like bookcases.
Handsaws are the most versatile tool in a woodworker’s arsenal. Easy to use and easy on your wallet. They don’t require cords and power sources or batteries.
Handsaws have been around for hundreds of years and are designed to cut through wood. Different types exist, so we’ve provided some guidance on what sets them apart and which ones might be appropriate for your material, especially important for beginners:
- Ripping Handsaws: Cut with the wood grain
- Crosscut Handsaws: Cut across the grain of wood
- Combination Handsaws: Used for cutting both rips and crosscuts
- Backsaws: Used for miter cuts, have rectangular blades with braced backs
- Carcase Handsaws: Larger and stronger backsaws
- Coping Handsaws: Like jigsaws and bandsaws for curved cuts
- Dovetail handsaws: For fine dovetail joint work
- Keyhole handsaws: Made to cut interior holes
A good quality hand saw can be the difference between having a great experience when woodworking and a frustrating time, especially for beginning woodworkers.
Supplies required for filing, planning, and sanding in woodworking
If you’re building an arts and craft project, all it takes is a few minutes with sandpaper to change the look. But if you want to build something practical, such as a workbench or kitchen cabinets, you need finishing supplies that get wood smooth. Otherwise, you’re left with dull surfaces and a lot of sanding.
Here are some tools that beginner woodworkers should have to finish and fine-tune their final project.
- Orbital Sander
- Planes
- Hand Files
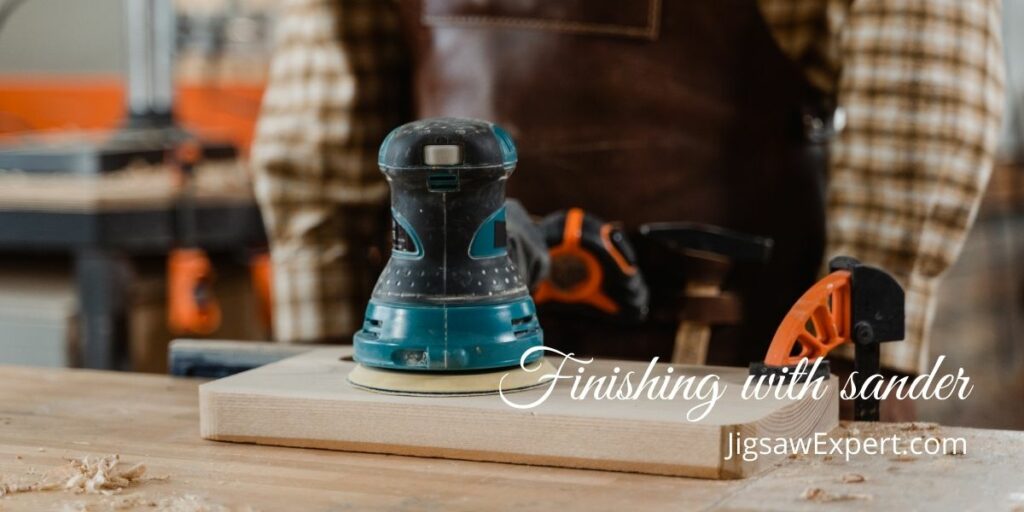
Orbital Sander
An orbital sander is an electric power tool, usually used in woodworking to sand flat surfaces and edges. It can be used with a random orbit sander that pivots at the top of the sanding pad to allow curved corners and other shapes. Unlike belt sanders, it uses sandpaper pads that turn in a circular or orbital pattern.
Woodworkers use planes for shaping and smoothing rough lumber into finished parts.
Many people agree that the best sanders are random orbital sanders. Unlike traditional methods in regular sanders, these tools oscillate in a random pattern to create an even finish and leave no marks likely to be visible, making them perfect for woodworkers who want both high quality and low maintenance on their work.
Planes
Planes are used to level the surface of the wood. Beginners may have heard about hand planes, but most people don’t know that there are other options out there.
Planes are cutting tools, not sanding devices – fixed blades are used to shave off wood fibers. Blade size and depth will determine if you have a light or heavy cut. It progressively smoothes the wood surface by removing extra wood pieces.
When it comes to plane terminology, there are several that sound foreign or amusing. Rabbet planes and jack planes both shave wood, but they have different applications. Jointers, blocks, and spokeshaves are other terms you may encounter. And numbers come into play as well; you may hear a tool called by its number rather than name.
Beginners should start with a block plane, which is the most versatile tool. However, there are other options that can be valuable additions to any starter’s collection.
All of the below hand planes should be checked by beginner woodworkers.
- Block Planes: This plane is small and plump. It is best suited for smaller projects with joints that require very smooth surfaces.
- Jack Plane: Traditional woodworking involves a lot of brute force. A jack plane is more than just a roughing out or smoothing tool, thanks to its dual edge types – curved and straight edge.
- Rabbet Planes: These are useful for cutting right angle groves along the board edge grain. These joints differ from inside grooves called dados.
- Scraper Planes: They are used to scrape the fine fibers off of a wood surface before applying a final finish, reducing potential problems with finishing.
- Joining Planes: Like a jack plane, a joiner is designed to smooth edges and joint boards together. Though they look similar to a jack plane, jointers have longer frames.
- Spokeshaves: Hand planes designed for curved surfaces. Designed originally during the 1800s to shape wagon wheels, these hand tools found widespread use in shaping wood.
Hand Files
These are the workhorses of wood finishing. They’re used to even out rough surfaces, remove scratches, and repair chips and gouges in your project. You can find them just about anywhere for less than $50. Often these are made of quality steel, so they last longer.
They come in different shapes and sizes depending on what kind of work they do. Beginners should look for a medium-sized option with coarse and fine grain.
For most woodworking tasks, hand files are necessary. If you’re building your own workbench, or just refinishing one with old wood, they help smooth the surface before applying stain or polyurethane. Hand files remove deeper scratches that sandpaper can’t.
There are a lot of hand file types in the market. But here are some file types that’ll work with your woodworking best.
- Rasp-cut has a series of individual teeth that are formed by a single-pointed tool. This produces a rough cut and is used primarily on wood, hooves, aluminum and lead.
- Single-cut files have cross-grained teeth for general shaping work.
- Double-cut files remove more wood in less time by using up to four cutting surfaces per tooth.
- Bastard has been used to describe any file with a square-shaped tolerance. The convex side of a half-round or other similarly shaped file.
When used with a suitable drill and chuck, rotary cutters efficiently remove material from flat surfaces. They come in different shapes and sizes to handle most tasks.
Hand files are also best for sharping other woodworking tools blades and bits. High-grade steel is used to make the teeth of most hand files, so you usually get what you pay for— invest in high-grade hand files.
Tools Needed For Assembling in Woodwork
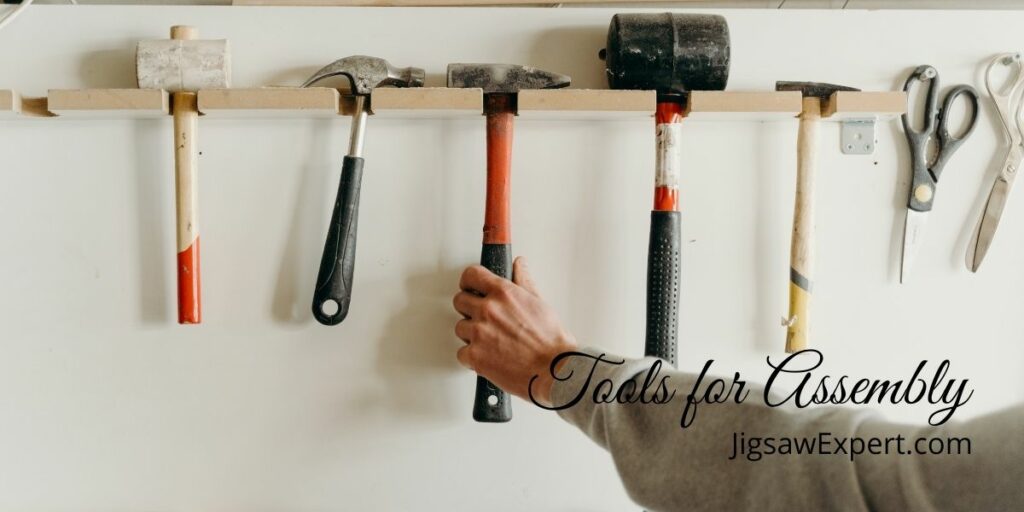
If you’re a woodworker, you know the importance of having some essential tools for assembling. You need to get your woodwork pieces together and make them look like they belong together. You can do this with just a few basic tools: screw gun, power drill, mallet, screw gun, and hammer.
In order to assemble woodworking projects, properly, and safely, you need these four tools handy so that you don’t have to worry about assembling your final woodworking project. Also known as “basic assembly” tools, these are used for putting different items together.
The tools needed for basic assembling in woodworking for beginners as well as pros are:
- Hammer
- Screw Gun
- Power Drill
- Mallet
These tools will be used to assemble the pieces of furniture or your other wood project together.
Hammer
A hammer is used to drive nails and assemble furniture, as well. Like the screw gun and power drill, it is a very handy tool that must be included in your list of basic woodwork tools. It is also one of the most useful tools for woodworkers.
It is very easy to use for different projects since it doesn’t need electricity or fuel to operate. Just use it.
But there are dozens of different types of hammers. You need to carefully choose the right type for you. So, before purchasing a hammer, consider its size and weight, head design, claw design, and handle composition for comfort.
It is also important that you choose a hammer handle made of hardwood. Soft handles are more prone to breaking and splitting, so they can be dangerous while you’re working.
Not all hammers are designed for the same tasks. It is important to identify what you will be using your hammer for before purchasing one in order to get something most appropriate, as there are many different kinds and uses.
These are the main types of woodworking hammers:
- Finishing hammers are versatile – all-purpose tools for any woodworking project. They’re perfect as your first purchase because they can handle so many situations and come in handy frequently.
- Framing hammer. These hammers are tough, but overkill for most projects.
- Tack hammers are similar to brad drivers that work with small wood pieces and lighter hammering. They have no claws.
Screw Gun
A screw gun is one of the most important tools for assembling in woodworking. It helps to drive small screws into pre-determined locations as directed by a template or a hole guide. Usually, it has an electric motor that powers up the driving of screws easily via trigger control and usually comes with different speeds.
When choosing your screw gun, consider its power to drive the screws. Your workpiece will dictate what speed and power you need for your tool. For example, a small woodworking project may only require a screw gun that can handle 1/4″ or up to 3/8 of inch bits which are also known as “fasteners for woodworking”. On top of that, consider the size of the screws you are going to use.
A screw gun is a type of power drill, but with the ability to hold hexagonal or six-sided bit shanks. In contrast, some models of power drills have round chucks that are designed for much larger bits. Additionally, there are many cordless models available to make these tools very easy to use.
Power Drill
A power drill is used to make holes in the wood. This is essential for assembling furniture; it allows you to add screws and nails for strength, thus making your project sturdier. It’s an important tool needed for assembling in woodworking.
In old times craftspeople were using brace and bit or a hand drill. But nowadays, an electric power drill is used as it helps speed up the process.
An electric-powered drill is useful in so many situations, and not just for drilling holes. There are all sorts of attachments you can buy to turn it into other tools, too.
Drills are rated in three sizes; the most common size is 3/8” (medium) and heavy-duty is 1/2”. Drills either have a keyless chuck or have a bit that holds bits with screws attaching them to the shaft of the drill.
Types of power drills
There are 2 types of power drills – corded power drills and cordless power drills. Depending on your needs and preferences, you can choose from one of these types. Corded will give you more power, while cordless power drills are more portable.
Corded power drills
Corded power drills are typically used in workshops and construction sites. They can also be used for both drilling and driving applications, though the amount of work they can do is limited by the length of their power cord. Corded power drills are more powerful than cordless models.
The downside to using a corded drill is that you have to plug it into an electrical outlet, so the length of the cord limits how far you can work from your power source.
Cordless power drills
Cordless drills are battery-powered and they don’t need to be plugged in. The batteries allow them to work for longer periods, although you will have to recharge them periodically. Cordless drills offer more flexibility in terms of where you can work, but they don’t have as much power.
Mallets
Mallet is a tool that can be used to drive wooden pins into holes or dents. There are different kinds of mallets: rubber, metal, and plastic as well. It’s usually used with a hammer in order to secure items together tightly and perfectly.
For assembling in woodworking, it is generally made of wood and used to pound wooden or metal objects together. You can also use the mallet for driving chisels into hard materials like stone or brick. You can use the mallet for assembling drawers, small boxes, furniture, and other items in woodworking. It will not harm your finished project if you hit it too hard when tapping to assemble parts together.
Beginning woodworkers should always choose not to use a steel hammer with their chisels. The shock from the metal tool will cause the blades of your chisels to jab or stab into the surface of your project with unpredictable results. A mallet on the other hand allows for a smooth, consistent finish even if you have inconsistent strokes.
The Mallet isn’t just a tool you’ll be using inside your workshop but also out there on the job. Whenever you’re working on projects that require assembling things together in woodworking, such as putting cabinet doors on the cabinets and installing drawer boxes into place, you’ll need to use a mallet.
Tools For Measurement And Angles
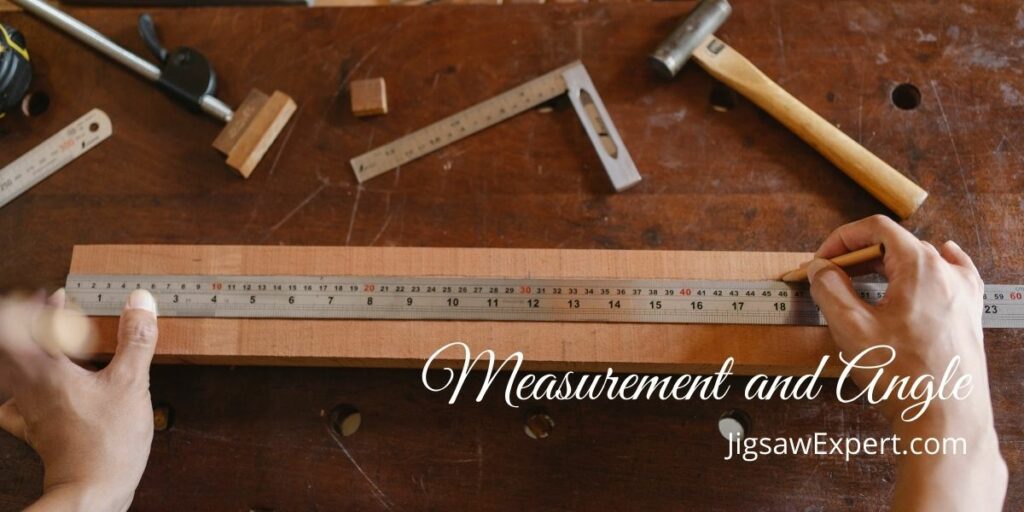
Measurement is fundamental in the woodworking industry. It is not to be taken lightly, which is why woodworkers have developed some sayings about measurement and angles. Old woodworkers say, “Measure twice, cut once”.
This is to ensure that the wood is cut correctly because it cannot be added back on after it has been taken off. This old saying implies taking special care with measurements when cutting wood. Another woodworker’s saying goes like this, “Measure twice, cut once and it will still be short”. Woodworkers have also developed tools to assist them with measuring and angles.
For beginning woodworkers, the following measurement and angles tools should always be available.
- A Square
- Tap Measure
Square for measurement
A square is a very useful tool for measuring lengths, checking angles, and marking lines between two points on a board or other workpiece.
This is a tool that comes in very handy for woodworkers when they are doing things like cutting, installing drywall, or tiling.
- Framing squares are large right-angle tools for larger work surfaces.
- Try Squares are smaller, right-angle hand devices for quickly taking measurements and verifying squareness.
- Combination Squares are good for checking precise measurements and angles.
- Miter Squares are excellent for cutting angled miters.
- Bevel Squares make it easier to preserve an existing angle and transfer patterns.
- Speed Squares: Let you check 90 and 45-degree angles.
Tape Measurement Tools
Tape Measure is a tool that has been in use for a long time. It enables woodworkers to measure distance easily. This tool features an elongated metal or plastic casing with two hooks on its ends, one at either end of the tape. The tape is coiled inside the casing and comes out discreetly through a small hole.
There are many types of tape measures to consider, but the basic models include:
- The flexible and retractable steel tape measure, which features a level at its top to enable woodworkers to make sure that the measurement taken is accurate and frank. This type of measurement ensures that measurements are not just short of the target, but they also help in avoiding over-measurement. The flexible tape comes in up to 100 feet length, while the retractable steel tape comes in lengths from 12 to 30 feet, which is generally sufficient when using them.
- The speed tape is a lighter version of the standard tape and is used for rough measurements in situations where weight matters more than accuracy.
- Folding rules are rigid measuring sticks that are used to get greater accuracy. They fold into sections for easy carrying and storage.
- Yardsticks and Straight Edges: These come in ruler form, handy for quick measuring or setting straight lines.
Woodworkers use a variety of measuring tools that enable them to measure accurately and consistently, thus getting the desired results they are looking for in their woodworking projects.
More Requirements For Successful Woodworking Projects
Woodworking is a hobby that many people enjoy. It can also be very lucrative if you’re skilled enough to take on commercial jobs, but for the average person, it’s just a good way to get out some creative energy and build something beautiful.
For any project, you should always pay close attention to the safety. For this check the pro woodworking safety tips.
Woodworking has always been one of my favorite hobbies because it combines so many different skills: carpentry, painting, crafting with wood glues and stains. There are some basic requirements that every project needs in order to come out well – whether you’re using an old table or building your own decking from scratch.
If your project also includes ceramics, you may need ceramic glues as well.
Workbench
The first requirement is having a workbench where you can clamp things down securely while you work on them (or even as just a place to lay tools). It’s very annoying to be constantly having to hold things down with one hand while you work because they’re always threatening to slide off the edge of your work: that makes it harder to concentrate on what you’re doing.
When setting up a workbench, the most important part is strength and sturdiness; I’d suggest using concrete blocks or brick posts as the base because they’re both strong, rigid materials and will help you avoid accidents where a workbench collapses under the load.
Woodworking Sawhorses
The second most important requirement is having saw horses (or at least sawhorse plans). A good way to make these is to attach four short pieces of wood together at a right angle using screws: you can then lay longer pieces of wood across these.
One useful variation is to use two sawhorses instead of one long one; this allows you to clamp the work down at either end and make sure that it stays put while you’re sawing away. Sawhorses are much less expensive than most of the other workbenches that are available so you should definitely consider getting a couple of these first.
I hope this blog post helps you find some useful information and gives you a great start to set up your basic woodworking tools; I’ve certainly found it to be an enjoyable hobby which has been very rewarding!
Woodshop basic tools for beginners – Video
Conclusion
Woodworking is a hobby as well as a good profession that many people enjoy, but success requires the right tools. Whether you’re using an old table or building your own decking from scratch, there are some basic requirements for every project that will lead to better results.
Along with the right tools, you will need to follow some techniques and safety measures to ensure that your project is a success rather than one of those stories you tell at the bar about what went wrong.
As in any profession, all the basic tools for woodworking require some care and maintenance if you plan on using them for a long time. These tools need to be cleaned, sharpened, oiled, and put away or stored when you’re done.
To do this properly requires some work on your part, but it will make the whole process go smoother and give you a better chance of success.
Please let us know your thoughts in the comment below. It helps us shape future posts.
Frequently Asked Questions (FAQs)
What tool should every woodworker have?
Every wood worker should have at least a decent power tool saw, like a jigsaw, besides the other must-have woodworking tools like planners and files, hammers & mallets, measurement taps, workbench, sawhorses, and hand saw.
What is the most popular woodworking tool?
There are many useful woodworking tools, but jigsaw or circular saw and table saw are the most popular woodworking tools nowadays. If you have anyone of these, like table saw, you’ll be able to handle all of your wood working jobs easily.
What are the 5 most common tools used in carpentry?
In carpentry, the following tools are most commonly used.
1. Hammer
2. Tape Measure or Speed Square
3. Chalk Line or Carpenter’s Pencil
4. Utility Knife
5. Tin Snips or Nail Puller.
What do I need in my woodshop?
Every woodshop should have
1. Power jointer and planer
2. Table saw, Circular saw, Jigsaw, and Hand saw – for different types of cuttings
3. Routers with different rounter bits
4. Combination square and tape measure, along with crayons, pencils, a knife and an awl